Moving Time/ Workshop Registration Opens

I am moving my blog to a new url: http://CarolSimmonsDesigns.com/blog, where I have created registration links for my 2012 6-Day Workshops. Please make a note of this new address.

Workshop Registration:

Go directly to registration links for updated information on workshops or register for a workshop.:

6-Day Intricate Kaleidoscope Pendant Intensive (2 Sessions/Locations)

6-Day Birds and Clay (Intricate Cane Veneers) Workshop, Bisbee AZ

Posted in Uncategorized | Leave a comment

Questions I Ask Myself about Teaching

I’m getting a lot of invitations to teach one-day and even half-day classes and I can’t decide what to do about them. It seems to me that there are plenty of quick project-oriented classes and tutorials around already. I can teach short classes and people enjoy them, but what really satisfies me is helping people fill in gaps in their skills and understanding so that they can become better artists.

I feel this is my real strength as a teacher. I love to develop new techniques and share them with others but when I teach the techniques they are secondary to this broader goal. Similarly, I view projects as a way to put learning into practice, not as objectives in themselves.

There aren’t many opportunities for this kind of teaching in the polymer clay world. It is the kind of teaching one would expect to find in an art school, but art schools have yet to embrace polymer clay in their curricula.  Since each of us has been exposed to a different array of classes, tutorials and workshops in our journeys with polymer clay we lack a common ground of knowledge and skills. As a teacher, my way of dealing with this diversity is to keep my classes small, to try to understand what each student knows and doesn’t know, and to go from there. This takes time.

I believe many polymer clayers would enjoy and benefit from this type of instruction; however, the trend is toward shorter classes, especially at conferences.  My dilemma is whether to go with the trend or use my energies to develop another option, as I’ve done with my 6-day workshops. Right now, I’m trying to do both.

Addendum:  I think it would be great if there were a series of classes that ensured students would have specific knowledge and skills to serve as basis for future learning.  The classes could be taught by different teachers all around the country but they would have a common curriculum.

Posted in Uncategorized | 25 Comments

Pendant Cords – Part I


I’m in the process of moving this blog to my general web site so I’ve been holding back from posting here. However, the transfer is taking longer than anticipated (isn’t that always the case?) so I decided to do one more post. My new site will have registration links for the three 6-day workshops I’ll be offering in 2012.
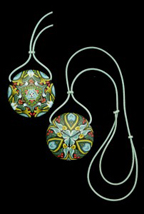
I’ve looked for years for just the right kind of cord for my pendants.  Most of the colored cords I’ve found have been too bright. I found some black cord but it didn’t look right because there wasn’t any black in my pendants. Other cords were too stiff or frayed too easily or had something else wrong with them.

Then I remembered that a number of years previously Jacqueline Lee had told me she used window blind cord for the pendants she sells in museums; she even told me where to get it: RW Rope online.  She said to ask for the “handy hundred” cord, which I did.  It is excellent cord but color availability varies because the the cord is ends from rolls used in a window covering factory  It comes in 4 diameters (I got the largest 1.4 mm) and the price is excellent. Unfortunately very few of the colors I was looking for were available.

I called the very helpful people at RW to see if other sizes and colors were available. I was told I could get cord in a wide variety of sizes and colors for practically nothing if I ordered a box of assorted ends from the cutting room.
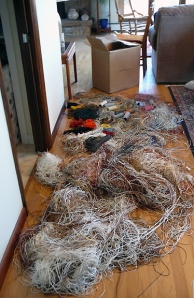
So I did. The shipping cost almost as much as the cord. This is what it looked like when I pulled it out of the box. Some of the cord was on spools, some in hanks and the rest was in a huge tangle. I did get some very nice colors but they comprised about 2% of the cord in the box and I spent quite a bit of time untangling it.

Now that I had all this cord, I couldn’t just throw it away, so I decided to dye it. This wasn’t as straightforward as I thought it would be. The cord is made of synthetic materials such as polyester and most dyes will only dye natural fibers.
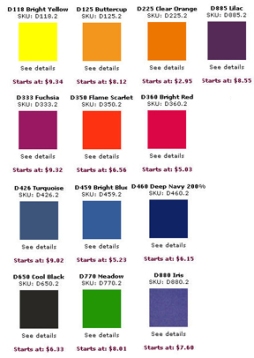
After quite a bit of research, I came across a company called Pro Chemical and Dye on the internet. They sell all kinds of dyes for various uses and one of them, called Pro-Disperse dye, comes in 12 colors and was just what I needed.

Its main drawback is that it is nasty stuff chemically.  It is necessary to boil the cord in the dye along with some other chemicals, producing fumes that that you don’t want to breathe.
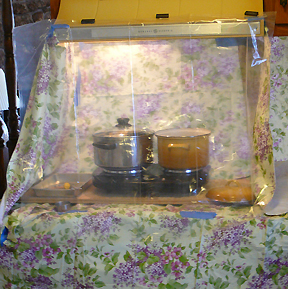
Since it was midwinter and I couldn’t work outside, I turned the stove top area in my kitchen into an exhaust hood by surrounding the stove and exhaust fan with plastic sheets.

This worked pretty well.  I dyed cord of different colors as well as white cord and got a wide range of colors. Many of them were somewhat muted, which I wanted. Sometimes I redyed cord in a different color.
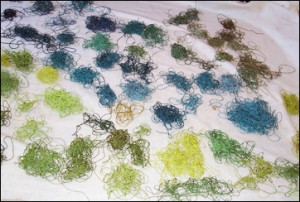
Once the cord was dyed, it had to be rinsed several times. Then I had to find a way to dry it. I settled for dropping it in piles of different colors on an old blanket.

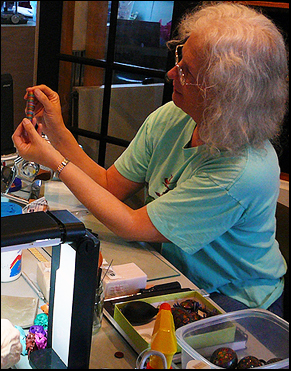
Once the cords were dry I rolled them into hanks. I keep them in my studio where they hang on the wall in transparent shoe holders. They are a beautiful site and I love looking at them. Visitors comment on the beautiful “wall art.”

The cords on the wall are sorted by color; this is about one-fifth of them.

Posted in Teaching | Tagged | 13 Comments

Back to Basics!

Bridget Downey's cane and her inspiration picture.

I learned so much from my 6-day workshops – I honestly don’t know who learned the most, my students or me. Some things worked out great and some I’ll do differently next time. However I returned home more convinced than ever that two basic precepts hold true.

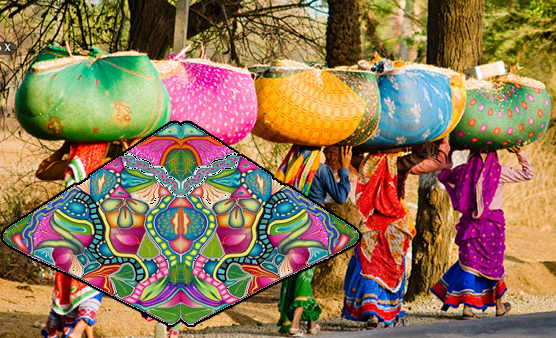
First, the results are almost always gorgeous when students start with a source of color inspiration that really moves them. Lee Ann Armstrong was strongly affected by the colors that surrounded her on her trip to India. She chose the photograph below which she had taken herself for her inspiration. Wouldn’t her cane make a wonderful fabric for a sari?

Even when students don’t quite capture the colors in their inspiration pieces the colors in their canes harmonize and the results are beautiful.

Julie Samara (left) and Debra Davis worked across from each other at Maureen's and shared this picture between them. Their results, however, are uniquely their own.

It helps if the images used, whether on fabric or paper, have shaded colors rather than flat ones. Notice how the shapes in the picture above appear flat but have a lot of shading that is reflected in these canes.

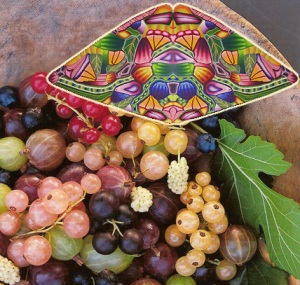
Peggy Keyes used this photograph of a bowl of currents as her inspiration. Her cane captures the softness of the colors in the picture.

Second, starting from primary colors and mixing the rest produces more beautiful colorways than working from a wide range of package colors.  All of the canes from these workshops were created using only primary colors and white with the occasional addition of black, or a neutral such as brown or ecru to modify the colors.

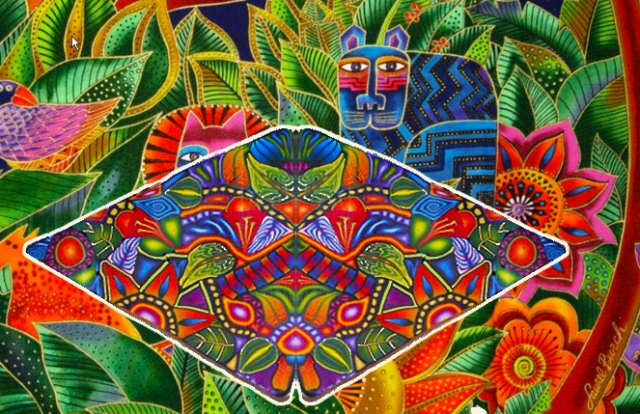
The shapes, images, and thematic elements in the inspiration pieces often find their way into the canes as well, as is clearly the case in the picture below.

Cane by Pat Ghadbane and the Laurel Burch fabric that inspired it.

Posted in Caning, Classes, Color, color mixing, kaleidoscope, Sources of Inspiration, Teaching | 12 Comments

Back in the Studio!

Cane by Beth Ackley

I’m finally back home after several weeks of traveling and teaching. I’ll be writing about my teaching adventures as well as other topics in upcoming posts. Both Maureen Carlson’s Center for Creative Arts in Jordan, MN and Shake Rag Alley School for Arts and Crafts in Mineral Point, WI were wonderful venues for teaching.

Cane by Laura Blakely

While I finish unpacking, you can read about the workshops and see more pictures in some of the students’ blogs. (Cynthia Blanton just finished writing about about her Shake Rag Alley experience and Julie Samara has written about her time at Maureen’s.)

Cane by Debra Davis

My Facebook page also has lots of images from my 6-day workshops. By the way, I picked the canes on this page for their striking color combinations. They are all gorgeous!

Posted in Caning, Classes, kaleidoscope, Teaching | 2 Comments

Sources of Color Inspiration: The Fabric Store

My posts are going to be short and less frequent over the next few weeks as I move into a series of workshop/retreats that involve a lot of travel. Next week I’ll be at a mountain retreat center with many of my polymer clay friends. I’m excited to be leaving everything that has to do with kaleidoscope canes or bright colors at home with my husband while I work in 3-dimensions with wire and earth tones.  Shortly after that I’ll head to Minnesota and Wisconsin to teach two 6-day workshops.

Two weeks ago Nettonya Ryane brought this gorgeous fabric to my Snohomish workshop for her color inspiration. It reminded me why I love to walk through fabric stores even though I dislike sewing. I have to admit I own several boxes of fabrics just so I can look at them and touch them. I find fabrics extremely sensuous not only for their colors and designs but also how they drape, how they catch the light and how they feel in my hands.  Beautiful or interesting objects that awaken multiple senses are particularly inspirational for me.

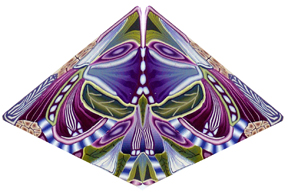
This is the cane Nettonya constructed using her fabric for her inspiration. The Premo primaries she used were fuchsia, zinc yellow and ultramarine. She used ultramarine rather than cobalt blue in order to capture those deep, rich purples and violets. The only other colors she needed were black and white. Nettonya gave me some slices of her cane to make some kaleidoscope designs. I’ll have to wait until things slow down a bit to work with the actual clay. Meanwhile I satisfied myself by  scanning one of the slices and making kaleidoscope designs on my computer:I made these kaleidoscopes by a somewhat laborious process in Photoshop. If you would like to play with kaleidoscope images of your cane I suggest you download the trial Kaleider application from http://www.whizical.com, which will allow you to do that and much  more. It has been one of my favorite toys for years. (Warning: The home page will drive you crazy.) Here is a Kaleider design made from a photo of Nettonya’s cane.Unfortunately, the Kaleider software is for PC’s only. It has lots of “bells and whistles” that take a while to get used to, but once you understand it, there is no end to what you can create. You can even take snapshots of your favorite designs.

Posted in Caning, Classes, Color, kaleidoscope, Sources of Inspiration | Tagged , , , | 8 Comments

Workshop Teaser (more to come)

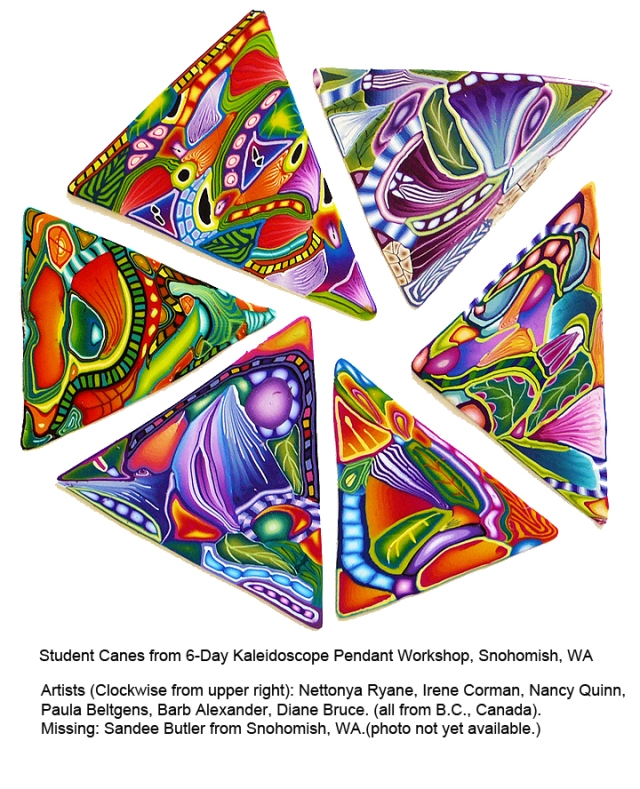
These are slices of canes made by six of the seven participants in last week’s 6-day workshop in Snohomish, WA. I will add a picture of Sandee Butler’s cane as soon as I receive it. Future posts will include the color inspiration images for these canes as well as some kaleidoscope designs from them. Thanks to all seven wonderful participants and our workshop host Randi Harper for an inspiring, joyous and rewarding week!

Posted in Cane Slicer, Caning, Classes, Color, color mixing, color theory, kaleidoscope, Premo Clay, Sources of Inspiration, Teaching | 2 Comments

Rainbows are Over (for now)

Announcement: One spot has just opened up in my Kaleidoscope Pendant Workshop at Maureen’s October 2-8, 2011.  More information here.

I have several 6-day workshops and retreats coming up in the next 2 1/2 months so my posts are likely to be shorter and less frequent as I scramble to prepare. Mostly, I’ll just be sharing what I’m doing.

Lately, I’ve been making sample canes for the workshops.  I haven’t had much time to think about color schemes so I’ve stuck to the zinc yellow, cobalt blue and fuchsia palette that was already on my work table. I picked a picture of a Tiffany lamp shade for color inspiration. The colors in the picture were slightly desaturated, but I chose to work with the pure hues as I’ve been doing over the past few weeks.

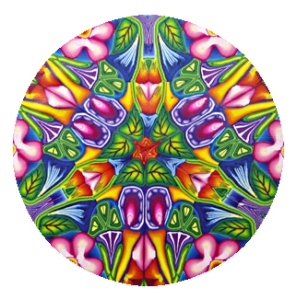
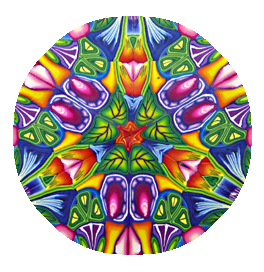
These kaleidoscope designs were each made from 6 triangular slices of the same cane. I barely trimmed the triangles so these kaleidoscope designs are large – about 3.5 inches across. The designs were originally hexagonal, but I trimmed off the points to make them circular.

They are too large for pendants, but they would make lovely veneers for the lids of cans or on circular clay boxes. The different designs were created by pointing different corners of the triangles towards the center of the hexagon.

As I worked with this cane I realized I am thoroughly saturated with saturated colors. These designs are simply “over the top” for me. My brain is over stimulated. I’m so ready to move on to more soothing, less saturated colors.  I can’t wait to see what they are. This is a good reminder to myself to work with colors that I love so that the process is fully satisfying.

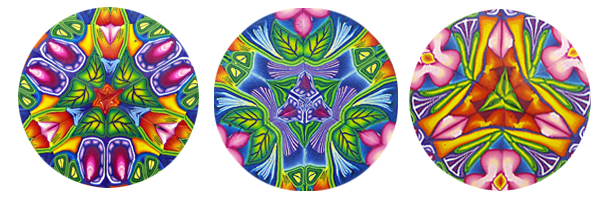
These designs are trimmed down versions of the ones above.

Different colors dominate in each of them because different corners of the triangles are cut off of each of them.

I find them a bit easier on the eyes. They are just a bit over 2 inches in diameter, the size of my larger pendants.

Trimming the designs still further results in kaleidoscopes below. Now the three are entirely different from one another because each is made with an entirely different section of the cane.

Posted in Caning, Classes, Color, kaleidoscope, Premo Clay, Sources of Inspiration | 3 Comments

Triangles to Squares to Veneers

Cane from previous post, kaleidoscoped.

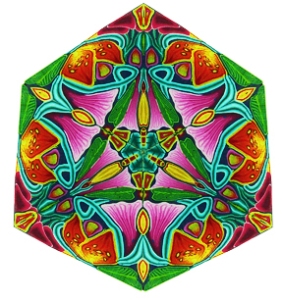
When I first published the previous post, it did not include a picture of the cane I was working on at the time. I added a picture of the cane later in response to a reader’s question. Here it is again, kaleidoscoped into a hexagon design in case you missed it.

The initial cane looked like this:

Initial cane used in all other images on this page.

6 slices of the triangular cane were mirrored on each other to form the hexagon. One reader asked about the relationship between this type of design and the veneers I posted a while ago, so here goes…

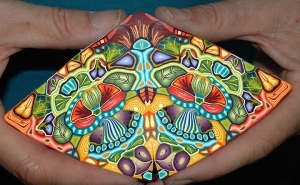
For the veneers the triangular cane was elongated then cut in half. The halves were lined up lengthwise to mirror each other, forming a rhombus (diamond) in cross section. The rhombus was reshaped so that the cane became a square in cross section. I could have sliced it and made it into a veneer at that point, but instead I reduced and recombined in several different ways using standard caning techniques and made veneers on several scales.

Here are two sections of large-scale veneers (click for larger views).

Below are sections of some different patterns made from reducing and the cane further and recombining it. They all started from the same triangle

These are some of the veneering techniques I’ll be teaching in my Intricate Cane Veneers workshops, for example the Birds and Clay Workshop in Arizona next spring.

Posted in Caning, Classes, kaleidoscope | Leave a comment

Color Consciousness: Sorting Scraps

I call these posts about color “Color Consciousness” to emphasize the fact that we are surrounded by opportunities to expand our understanding of color and color interactions if we just pay attention. (I mean really pay attention – what color are tree trunks?)

The cane I was building when I generated the scraps below; kaleidoscoped.

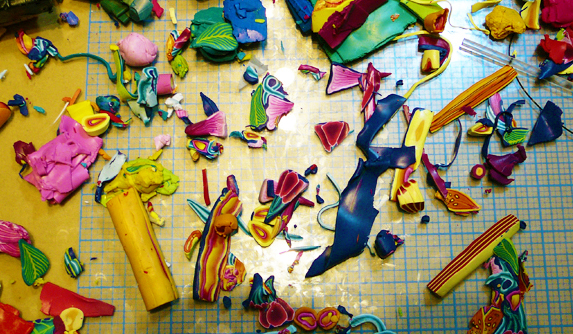
I believe that paying attention to color as we go about our daily activities builds a reservoir of understanding that will ultimately enrich our art.  For example, because of my poor work habits, my work surface is usually littered with scraps of clay at the end of a project. Unless I want to end up with one big ball of “mud,” I have to sort the scraps into color groups as part of cleaning up.

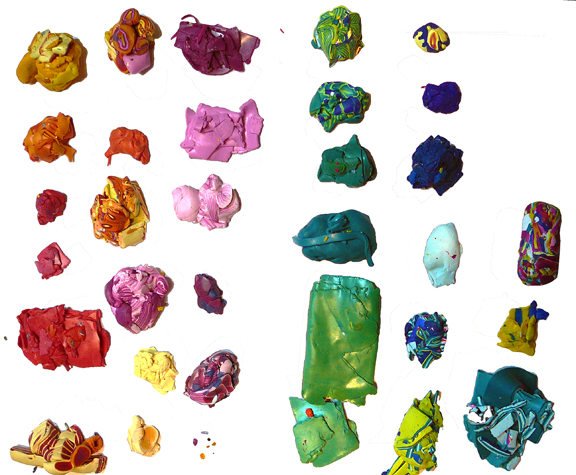
The sorting process provides good practice in color matching. When I pick up a scrap of green I have to decide which of my different piles of green I should put it in. If my piles of greens are similar to each other in hue,  I try to pick the best match as I lift the scrap rather than waiting until the scrap is closer to the piles.

A representative section of my work surface after my latest project.

Right or wrong, I’ve learned something about color in the process. Sometimes I’ll notice two scraps side by side that look particularly beautiful together. I make a mental note to try putting them together in a future project.

Piles of clay sorted by hue.

If there is enough scrap, I separate light, dark and medium values of the same hue into separate groups. This leaves me with more options for how I use the clay in future projects. Now comes the fun part: I blend the piles individually using the pasta machine, creating an entirely new range of colors.

Piles of clay after blending. Locations of blends match original piles.

The cane I constructed was for one of my classes. I started with only fuschia, zinc yellow, cobalt blue, white and a tiny bit of black. The colors in the cane were extremely vibrant, except where I lightened them with white. These new colors are less vibrant because most of them contain a little bit of a third primary as well as quite a bit of white, but I love them for their richness. When I mix colors for a project, I almost always add a bit of a third primary to “knock the brightness down a bit.” To my eye, muting or desaturating the colors a bit adds interest, a bit of the unexpected, and makes them more beautiful. Because all of the colors above were mixed with the same primaries, the blends all go together as well. None of the colors jump out as not fitting.

One other thing I often do is pull out individual colors and put them in groups that I think go well together. These are some of the groupings from the collection above.

I seldom take notes and never save “recipes.” I just try to pay full attention to what I’m seeing and store the knowledge in my subconscious. I truly believe that doing this gives me a repository of color “sense” to draw on in the future.

Posted in Caning, Color, color mixing, color theory, kaleidoscope, Premo Clay, Sources of Inspiration, Teaching | 17 Comments